Extending the Built-in Phong Material Shader in Three.js
Extending a Shader
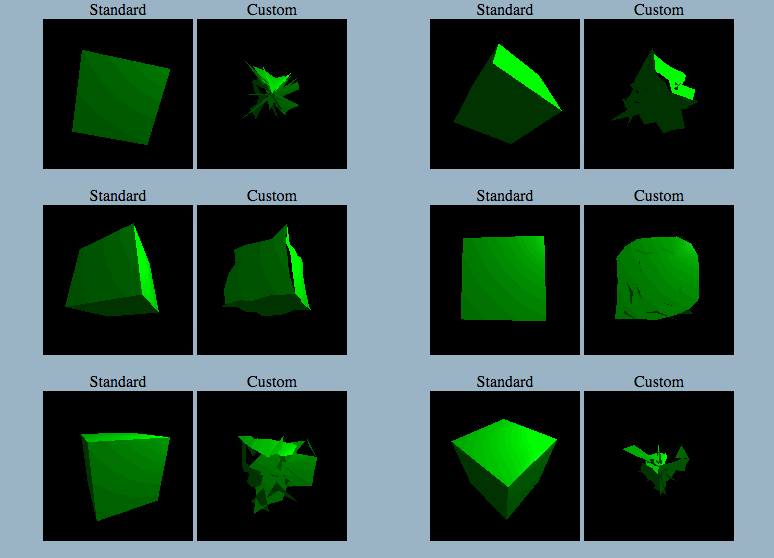
When working on a recent Three.js project, I wanted to extend one of the standard, built-in shaders like the MeshPhongMaterial shader. While it doesn’t seem like there is a super easy way to do that, there were some suggestions on StackOverflow. After futzing around for awhile, I created this customization on top Three.js’ Phong vertex shader for demonstration purposes. If you check out the link, you’ll see the cube on the left uses the standard Phong material shader, and the cube on right uses the custom one. The code is on GitHub.
In this post, I’ll describe the process in case you’re interested in trying it yourself.
Modifications
The first thing I did was modify the creating-a-scene tutorial from Three.js’ docs to use the standard Phong material instead of the standard basic material. The only catch is that the Phong shader requires lights to be present, so I added in an ambient light and a point light.
The GLSL code for the standard materials currently live in the src/renderers/shaders/ShaderLib directory of the Three.js repo. Among the files in that directory is meshphong_vert.glsl, which is the shader I wanted to customize. I copied the code from meshphong_vert.glsl and pasted it into a <script> tag in index.html so I could later extract it with JavaScript. Note that for a production application, it’d make a lot of sense to use your asset pipeline to import these custom shaders rather than sticking them in a <script> tag.
Next, I modified the Phong vertex shader. The first modification was to add a uniform and an attribute:
uniform float time;
attribute float offset;
The time uniform will be updated every frame with timestamps from requestAnimationFrame. The offset attribute will contain a random float between 0.0 and 1.0 that will be used to slightly offset individual vertices.
The second modification was to displace each vertex of the cube as a function of time and the offset described above. I did this by by modifying the coordinates of gl_Position (which is how the vertex shader tells WebGL the position of each vertex) :
float warp = time / 3000.0;
gl_Position.x *= abs(sin(warp + offset));
gl_Position.y *= abs(sin(warp + offset));
gl_Position.z *= abs(sin(warp + offset));
It’s important to put this code after the #include <project_vertex> line copied from the standard shader because project_vertex.glsl is where the standard Phong shader sets the original value for gl_Position.
Having placed the custom shader into index.html, it can now be used to shade the cube:
var customVertexShader = document.getElementById('js-custom-vertex-shader').textContent;
var customUniforms = THREE.UniformsUtils.merge([
  THREE.ShaderLib.phong.uniforms,
  { diffuse: { value: new THREE.Color(cubeColorHex) } },
  { time: { value: 0.0 } }
]);
var customMaterial = new THREE.ShaderMaterial({
  uniforms: customUniforms,
  vertexShader: customVertexShader,
  fragmentShader: THREE.ShaderLib.phong.fragmentShader,
  lights: true,
  name: 'custom-material'
});
First, the vertex shader is pulled out of the DOM. Next, the default Phong uniforms are copied out of ShaderLib. I manually set the diffuse uniform to the cube’s color and added the time uniform that will be updated with timestamps from requestAnimationFrame.
With the uniforms ready to go, the next step was to create the ShaderMaterial that takes the custom vertex shader as input. Since I’m not modifying the Phong fragment shader, I passed in the standard one from ShaderLib.
From here forward, the only departures from the standard Phong material scene is that, when using the custom shader, I set the offset attribute per vertex when first configuring the scene, and I update the time uniform every frame. Check out the code here to see how I went about doing that.
Long Story Short
Long story short, it’s totally possible to modify Three.js’ built in shaders, albeit with some vigorous copy/pasting. Please let me know if you found another way to do it that feels less hacky.
